This tutorial will show you how to sign documents in Microsoft Word. That is to digitally sign MS Office documents on your computer. The usual way of signing documents is by printing them out and signing them with an ink. But, your documents can also be signed before you even print them out. With all Microsoft Word versions, this can be achieved.
STEP 1
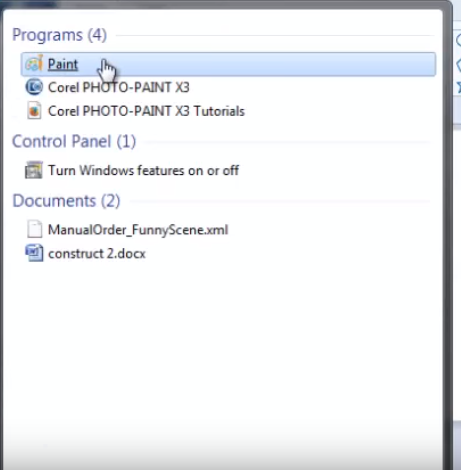
Go to Start/All Programs/Accessories/Paint. Or you can type Paint it in the search box and hit enter.
Whiles paint is opened, click on Brush and make sure the selected colour is black or whatever colour you want.
You then sign the signature you want inside paint by holding the left mouse button whiles dragging the mouse.

When you are done, click Ctrl+S or go to the top left hand corner, look for save and save the signature. Save it on your desktop for easier access.
STEP 2
I assume you already have the document you want to sign.
So open the document in Word. Whiles in Word, click on Insert, then choose picture. Locate wherever you saved the signature and double click on it to insert it into your document.
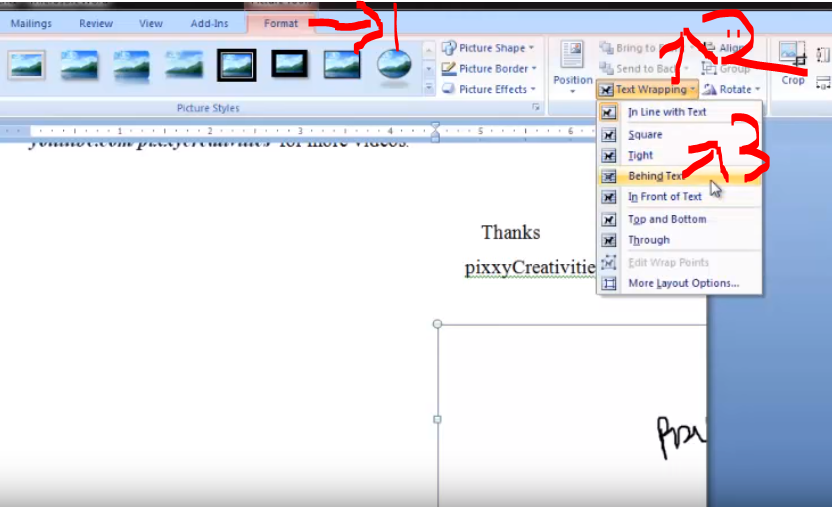
Whiles the picture is still selected, click the Format option in the menu bar and on the right hand side, click on Text Wrapping then choose Behind Text.
So open the document in Word. Whiles in Word, click on Insert, then choose picture. Locate wherever you saved the signature and double click on it to insert it into your document.
Whiles the picture is still selected, click the Format option in the menu bar and on the right hand side, click on Text Wrapping then choose Behind Text.
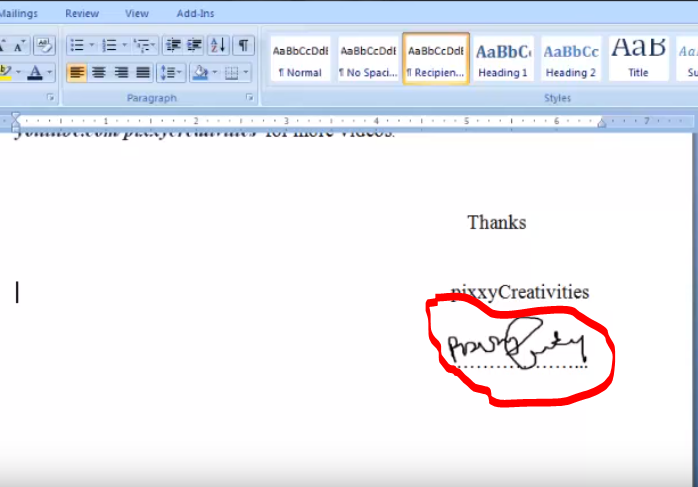
You then only have to move the signature to the position where you want it to be by dragging and resizing it until you get a perfect size.
Read Also
I will send you new posts straight into your inbox so you don't have to come here often. Please subscribe below.
[bftpro 6]

Good (NO GREAT) info.